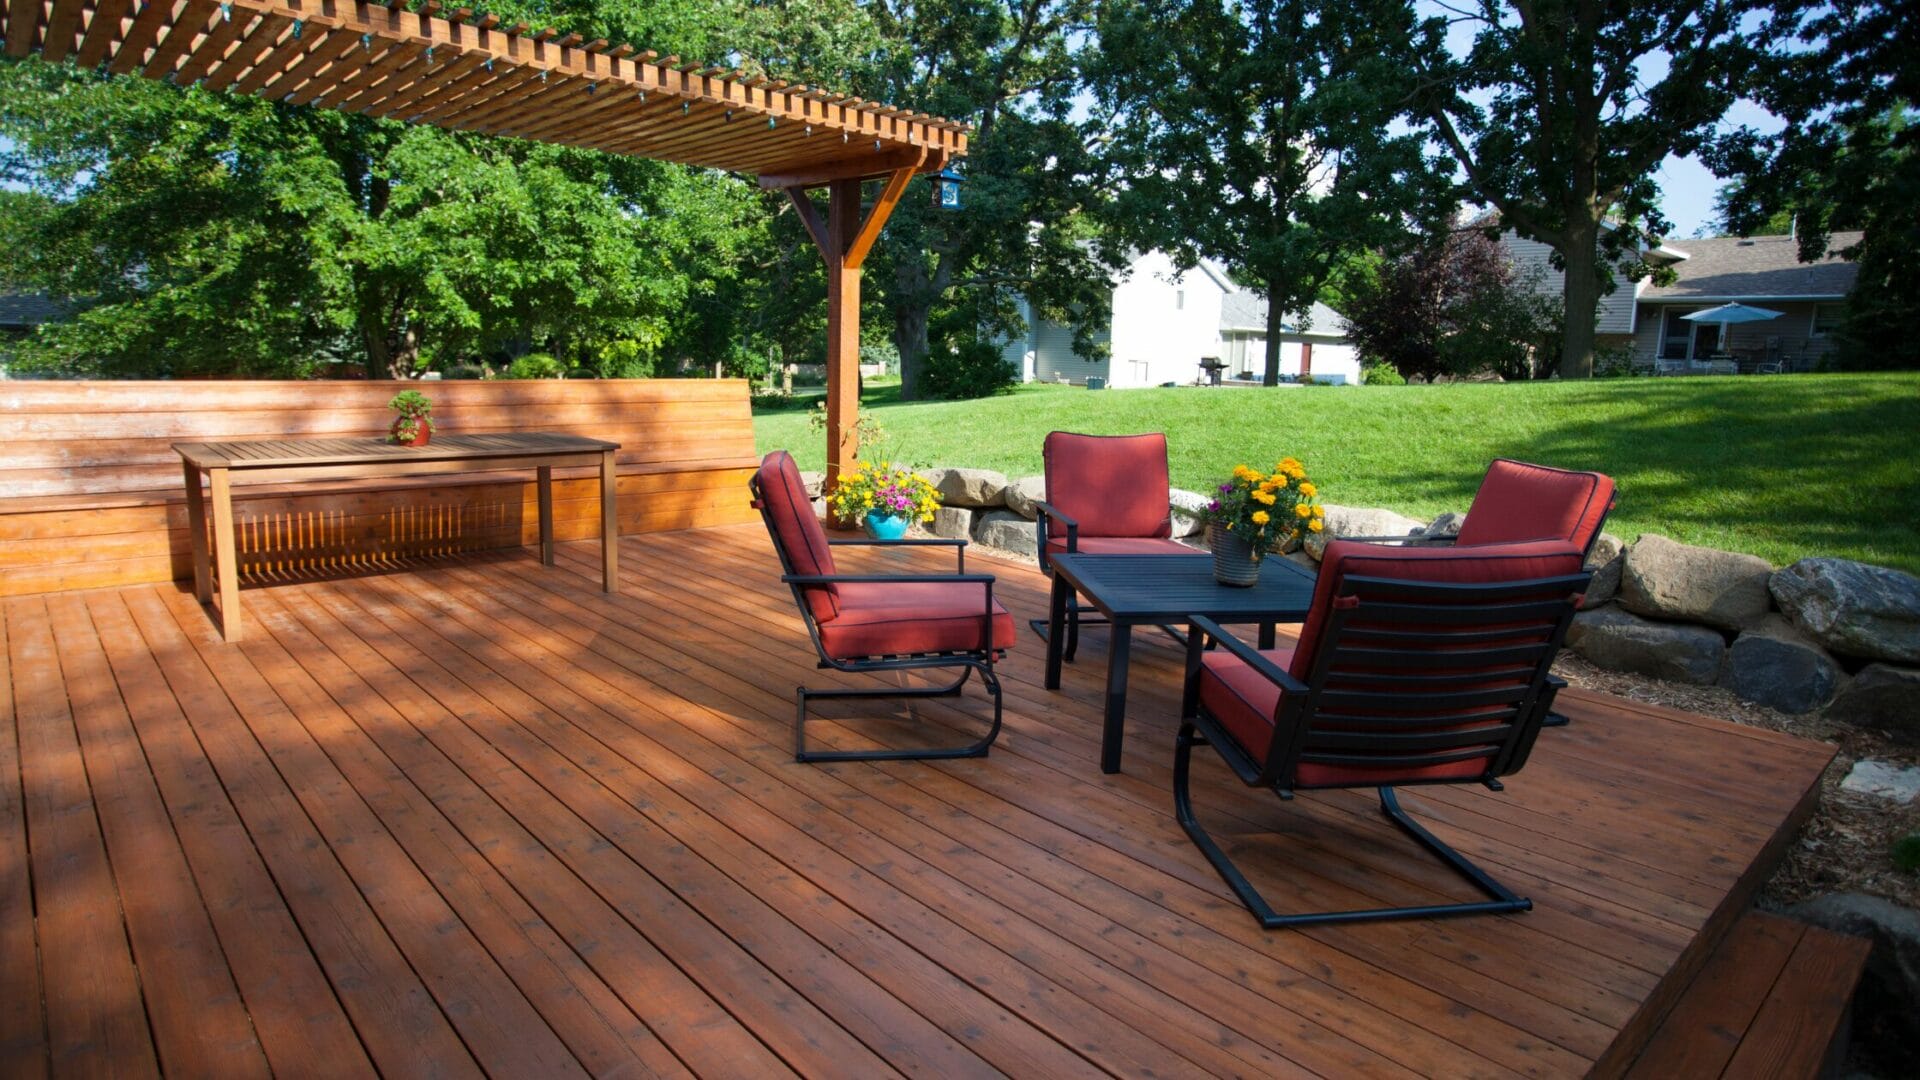
Deck design determines how you use your backyard and how much time you spend outdoors. Start by designing activity zones so the deck flows from morning coffee to dinner parties and late-night lounging. Purpose-driven layouts improve circulation, reduce trip hazards, and concentrate wear where it’s easier to maintain.
Quick Summary
Design for activity: map how you use the space, whether dining, grilling, lounging, or play, and zone the deck so circulation, safety, and wear are optimized. Plan layered lighting early so electrical work matches the final layout and prioritize step and pathway lights for safety and evening use. Choose materials based on budget, upkeep, and Kansas City weather, and mix materials where it adds texture and durability. Aim for seamless indoor flow with low-profile thresholds, two-level layouts, and built-in seating or storage to increase usable space.
1. Multi-Use Zones: Design Layouts That Adapt to How You Live
Design for the activities you want to have on your deck, not the furniture you plan to use. Start by mapping what you do on the deck, such as eating, lounging, grilling, or watching kids play, and zone the layout around those activities. Planning by purpose rather than by placing a sofa or table first improves circulation and keeps the space useful as needs change.
2. Layered Lighting: Plan Electrical and Mood for Evening Living
Good lighting keeps people safe and extends how you use the deck after dark. Start by listing the fixtures you want so that electrical work matches the final layout. Consider where your main, accent, and safety lighting belong during the initial planning stages.
Common options include step lights recessed into risers or mounted on treads, post cap lights for a soft perimeter glow, and recessed deck-floor or under-rail strip LEDs for a modern effect. String lights and integrated strip LEDs under rail caps or bench edges add portable ambiance and accent lighting.
Choose the power approach that fits your goals. Low-voltage systems with a 12-volt transformer provide reliable, dimmable performance and simple dimmer integration, while solar works for paths and low-traffic areas without wiring.
For a clean, contemporary look, install thin LED strips under rail caps and recessed lights in stair risers to create a floating effect and glare-free steps. Route power inside joist bays and under the fascia where possible, use IP65 or better fixtures with marine-grade cable and sealed connectors, and keep drivers accessible in a ventilated, weatherproof box for future service. Program smart scenes and zone control with separate circuits for main, accent, and safety lighting, and run a spare 3/4 inch conduit during construction so you can add sensors, speakers, or uplights later without opening the deck.
3. Outdoor Kitchens and Bar Areas That Extend Living Time
Decide whether an outdoor kitchen fits your routine before you finalize the deck design. If you cook outside weekly and host groups of six or more, a full outdoor kitchen pays off; for occasional grilling or when resale is the priority, a compact station gives better return. Match the scope to how often you entertain and how much permanent storage and service you need, so the kitchen supports your lifestyle without overspending.
For small yards, a compact grill island works well. A 6 to 8 foot island with a built-in grill, a 24 inch prep counter, and a small under-counter fridge supports efficient workflow and seating for two or three bar stools. Use heat-resistant countertops such as stainless steel, porcelain tile, or sealed concrete and place noncombustible surfaces or stone pavers immediately around the cooking zone to resist heat and grease.
A built-in bar and service wall will keep entertaining smooth and organized. Plan for a fridge, sink, storage, and a pass-through counter sized for bar stools so guests face the action. Include overhead coverage, integrated lighting, and GFCI outlets, and coordinate rough-ins with electricians and plumbers so utility work happens before finishes go down.
4. Mixed Materials and Textures for Contemporary Appeal
Choose a base material that fits your budget and lifestyle, then layer textures and trims for a contemporary look. Below are typical pros, cons, and installed cost ranges to weigh the upfront price against the long-term value.
Pressure-treated lumber has the lowest upfront cost and is easy to fasten, but it needs sealing or staining every one to three years. Cedar offers a natural appearance and insect resistance but requires periodic staining and will gray over time.
5. Low-Profile Decks and Seamless Indoor-Outdoor Transitions
Lower thresholds invite more use and make your yard feel like part of the house. Zero-threshold sliding or low-profile pocket doors work best, while taller sills may require a small ramp or a recessed framing detail. Coordinate the joist height and decking thickness with the door sill early to achieve a flush finish without rework.
A ground-level platform with integrated planters defines an outdoor room and often removes the need for tall railings or complex footings. That shallow platform also adds privacy while keeping the deck close to grade. Confirm local codes early, since permit requirements and frost-depth rules will affect footing and post sizing.
Pergolas, motorized shades, and retractable screens extend the months you can use a low deck without blocking sightlines. Choose motorized fabrics or woven screens that roll into the pergola, and run conduit for lighting and speakers while framing is open, so wiring stays hidden. With flush thresholds, planter borders, and planned shade provisions, a low-profile deck becomes an accessible extension of the home.
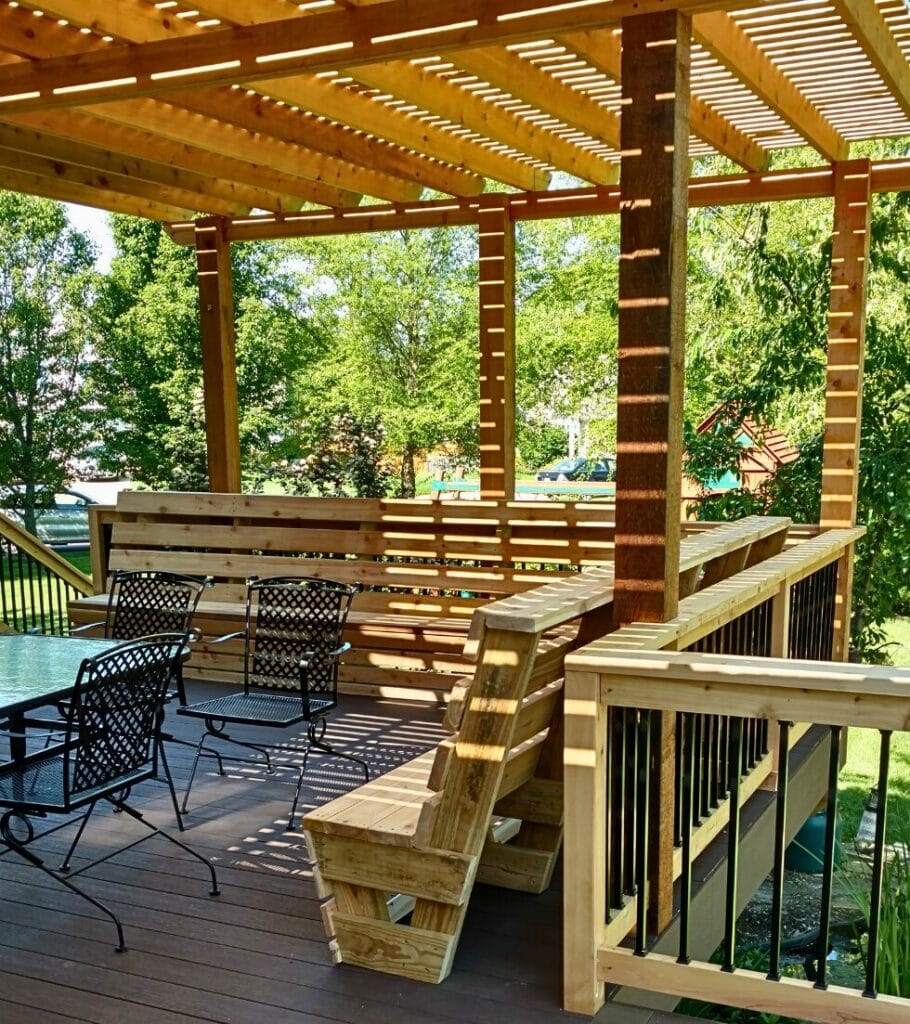
6. Built-In Seating, Storage, and Modular Furniture
Built-ins make small decks feel larger and reduce clutter. Consider storage stairs, benches with lift-up boxes, and integrated planters that double as screens. These features concentrate wear where materials are easiest to access and keep the main deck surface clear for furniture and traffic.
Design built-ins to match the chosen deck material and use appropriate fasteners and flashing. Keep lids ventilated to prevent moisture buildup, add gas-strut hinges for easy access, and plan electrical outlets and lighting near seating areas. Modular, plug-and-play furniture lets you reconfigure the space for different activities while minimizing permanent penetrations through the deck surface. See our deck gallery for built-in examples and layout inspiration.
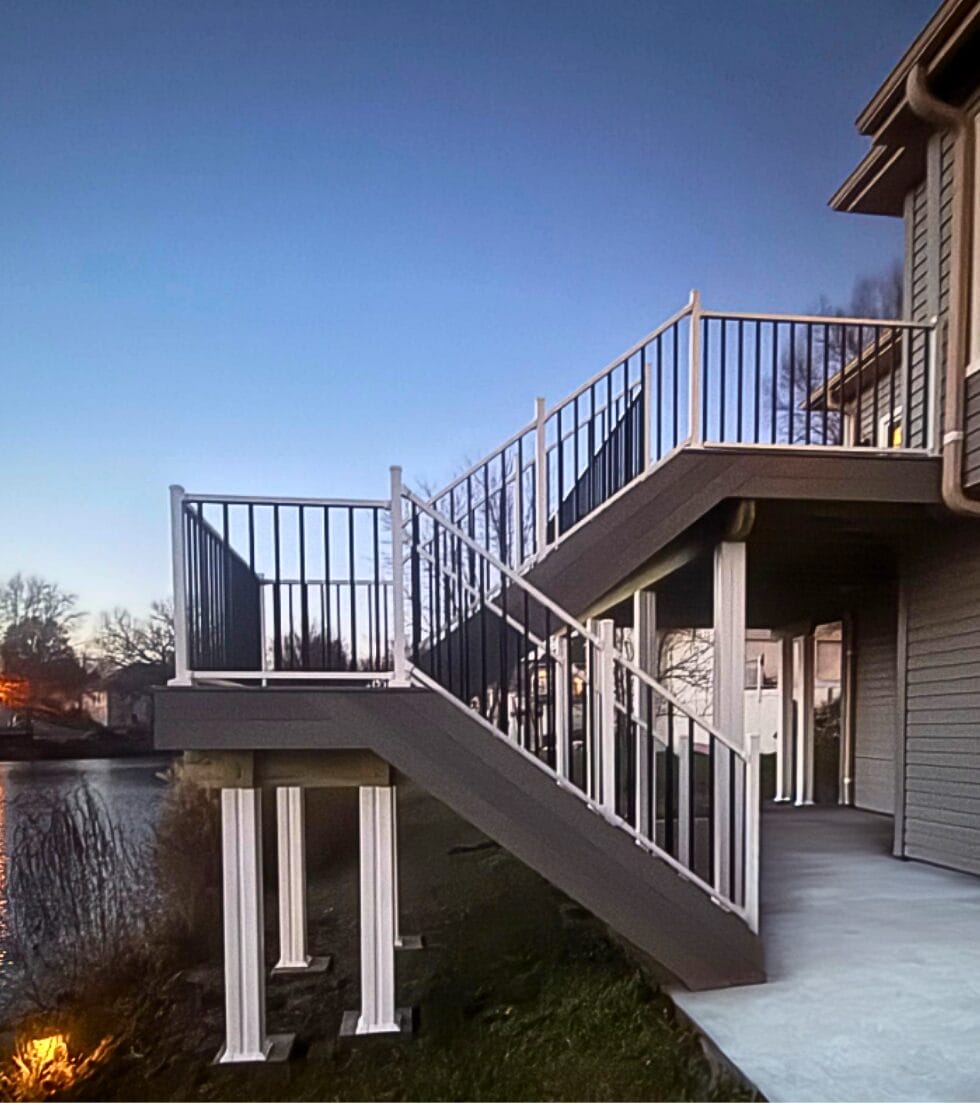
7. Steps, Railings, and Safety Details
Transitions and guard elements must balance safety with clean sightlines. Small elevation changes, 12 to 18 inches, usually require two to three steps. Larger drops can trigger guardrail requirements, so confirm local code early. Design treads with proper nosing, consistent riser height, and anti-slip surfaces for safety in wet conditions.
Combine handrails, integrated step lighting, and contrasting tread materials to reduce trip risk at night. Recessed step lights, under-rail LEDs, and post-cap lights provide layered safety without glare. When specifying railings, consider metal or cable systems for minimal visual obstruction. Keep replacement and maintenance access in mind. Removable panels or screw-on caps simplify future work.
8. Planters, Short Retaining Walls, and Terracing
Planters and short retaining walls help define zones, provide seating, and manage grade changes without heavy construction. Low planters of 8 to 12 inches create a planted border and occasional seating, while short retaining walls can terrace a slope and create usable flat areas.
Use durable, moisture-resistant materials where soil meets decking and provide drainage behind retaining walls to prevent soil pressure buildup. Integrate planters with built-in irrigation access or removable liners for seasonal planting, and position planters to frame views or block prevailing winds without obstructing circulation paths.
9. Maintenance, Material Lifespans, and Cost Planning
Balance upfront cost against long-term maintenance when choosing materials. Expect pressure-treated wood to need staining or sealing every one to three years and to last roughly 10 to 20 years with care. Cedar typically lasts 15 to 25 years with periodic staining. Composite boards often last 25 to 30 years, and PVC can exceed 30 years with minimal upkeep.
10. From Idea to Permit: Common Mistakes and Working with Kansas City Top Tier Exteriors
Test designs visually before you commit to materials or layout. Turn a render into buildable plans by site measuring, verifying grades, setting joist spacing, and confirming ledger and footing locations. Common planner mistakes include missing ledger flashing, wrong fasteners, and incorrect joist spacing. Address these by adding flashing details, updating footing depths to local frost lines, and specifying structural fasteners in the notes.
Kansas City Top Tier Exteriors makes the process straightforward in the Kansas City metro area. We provide a free on-site estimate with an itemized proposal, create custom 3D renderings you can approve, prepare permit-ready plans, pull permits, and install with trained, full-time crews, not subcontractors. We maintain daily cleanup and back our work with a one-year workmanship warranty so you get clear communication and reliable follow-through from start to finish. View our wood deck portfolio for recent projects, and read a Deck Review by Katherine P. about her experience with our team.

Make Your Deck Design Work for Every Backyard
Good deck design does more than look good. It supports the way you live. Create deliberate multi-use zones so dining, lounging, and play do not feel crowded, plan layered lighting for safety and atmosphere after sunset, and consider an outdoor kitchen or bar to extend entertaining. These elements increase daily enjoyment and can make your home stand out when you sell.